2019/11/29

2019_11_28 Albury all laid out...almost!

2019_11_28  Al and I continued on with Albury

Its taking time but we are almost there.


 Junee end comes together.


 The last set of points to be installed. The straight leg comes from the double track storage siding on the bottom level of the helix. Trains supposedly heading for Sydney can be hidden in here turned ready to make UP journeys at a later time.
The right hand side leads to a double track helix where trains can be stored or run out of sight back into other side of room where they become available for SG running. It really forms a continuous loop, if we a short staffed and want to see trains running.


 Al shows his stoic patience :)


 Here the 44" / 46" turnout leads from the loop road closest, or the main line, into the store roads or towards the helix.


 And the BG track arrives at Elders / Bunge closest to edge


 Guess who was working this bit? Certainly wasn't me ;)


 This if just the North end of the yard :(  The South end with Platforms is behind the camera.
The old trusty trolley can be seen under the helix. This old bloke would never last out the hours needed to wire up this "two wire" DCC system. :D


 I haven't started the scenery yet, but something is firmly rooting itself in ??


 The large hole is under the Indonesian double points and a servo point motor already mounted is in view.


Of course, red and black wires to the DCC bus and white wires to the live frog controller (frog juicer)
 The bundle of wire is to feed the helix Black to left. Blue feeds BG track and Green SG track (I think?)

And so? Jobs to do?  
Install the last set of points and then join up all these wires to the bus.
Install about 30 point motors and then decide how we are to control them all.

Cheers
Rod

2019/11/19

2019_11_19 Finishing off new loop track.

2019_11_19  Ok just to prove I can do it! Bung eye and all :D


And so (as explained last post) this (un-named station) needed something else to turn it from a "Stopping Point"  into a station fitting the buildings


 So we extended the base board and swapped out the LH point for a double slip, moving the point to No 2 road to create an extension for longer trains.


Pretty happy with the way it works. Only need a few wires to be joined into bus and four point motors.


 So here is the first cross 701 on loan from trough running pool, set back into siding as the local Pass arrives from Honeysuckle.


I like my little station now, and I was fortunate to get it in with the new fascias in place..
Just discovered I was running short of servo motors, and leads.  Australian price about 5 times the Chinese price and so order placed on China as well as another100 m of 5m led light tapes.
Cheers
Rod

2019/11/17

2019_11_17 Can I still lay track?

2019_11_17  Putting in the new siding.


 Left hand point out and double slip to go in. Now it is not correct to have a double slip on the main, and that would most probably put a speed restriction up. I don't think VR trusted the maintenance to reach a high enough standard to keep such a complicated piece of track safe for 70 MPH. But model railways are always going to be a compromise.


 The track work here, was always a bit crappy, and so I will replace the old stuff with new, only recycling the point to the siding.


 So here is the general layout.


The rail joint was a little bit too far back, but this will work, better than to have a short bit of rail before the point.
Ok so all wires soldered on, underlay prepped, and visitors are on their way. Hopefully get back to this tonight.
Cheers
Rod

2019/11/15

2019_11_15 Couple of good work days!

2019_11_14  Thursday14th was another Al-day working on Albury,


 I usually feel for Al when I get him to help, but track laying Albury is actually being kind? Well at least he is able to sit down on the job ;)


 Albury yard is nearing the Sydney end.


 Now Al is lining up the points at the other end, where all 6 SG tracks enter the double LH points that separate the main line climbing the helix from the double track storage loop that runs around the bottom of the helix.


Here he is setting up the hand made Indonesian double LH points, which match the helix radius (44 and 46 inch)


All this time I am doing my wiring trick,which I believe will guarantee continuity on my entire layout.
The red and black wires guarantee the connection to the point body, and the purple and green wires connect the blades into the same circuit. The live frog is switched by a Tortoise point motor, or a Tam Valley juicer via the white wire.
Very time consuming, however its nice to know that mechanical connections on Peco point motors are not relied on to stay working.


2019_11_15 Friday was a scenery day with Graeme!


 Before Graeme left today, I got him to help me set up the lights on the top level. Graeme wanted to see two strings of LED's. So the top level is two strings and the bottom level a single string. Camera lies and the extra light is noticeable.


 At night....


 OK the main job today was the top level facia. It has two layers and the first one is screwed into position and stand offs create a little more space for scenery.
The top face was then glued on top ready for painting.
The top was then contoured with a Stanley knife which was a bit frightening to watch. After breathing a sigh of relief when we finished doing that to wait for the glue to dry before finishing off next time I keep looking at that lovely little station sitting up there. I really like it, and I bought it on EBay years ago.


 But it was a bit of an orphan. Although it had a large grain silo behind it, main line trains needed to back into the grain terminal from the main line. It needed a siding, and now was the time to speak up.


 So now this little station has a No2 road to service its customers.


 Needs a pair of points here at this end. Runs down through a crossover and double slips to enter the main, or the silo area.  Nice, and I really like this change :)


 As well during the week, I almost finished re-wiring the old Helix. First thing I did was connect in two EB1 circuit breakers and supply power to three wires Pos bus for BG, Pos bus for SG and a black bus return. I am now in the process of hot gluing the wires out of the way, and reconnecting the track power wires to their correct sub bus lines.

Cheers
Rod Young

2019/11/13

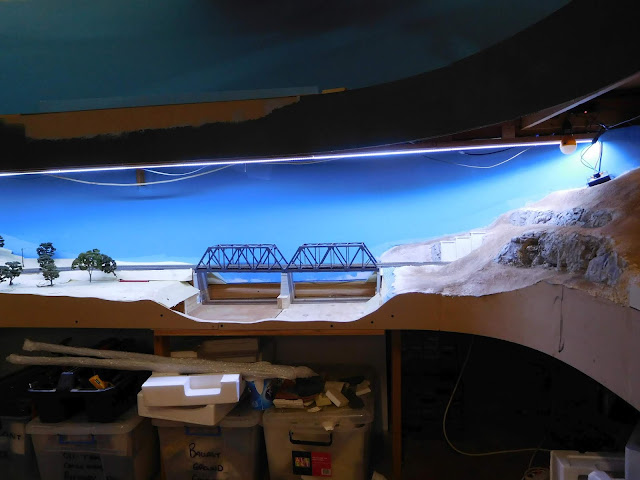
2019_11_14 Something different Dimmable LED's

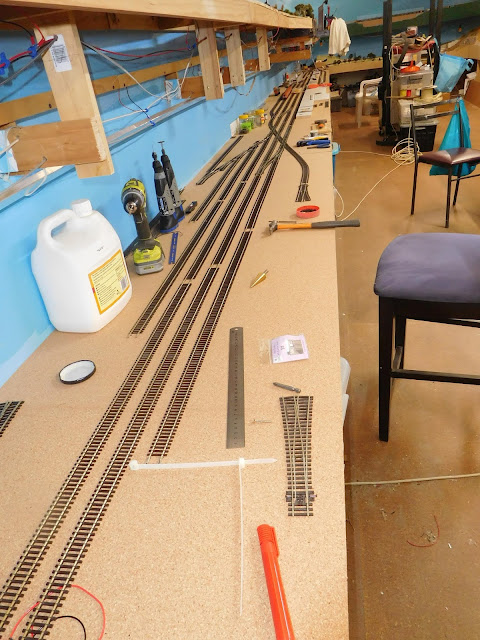
2019_11_14  I sorted  out a 3m section of LED strip and hooked it to a dimmer switch.

Unfortunately the camera compensated for brightness and pictures don't show the difference.
The brightest setting hurts your eyes and after 10 minutes the aluminium heat sink was very hot to touch. As I see it the LEd's are cold, however the surface mount resistors are many and cumulative heat is the result.
Also I have a 12v regulated switch mode power supply. I might have to check the output voltage on that too.
I think I prefer the sunny white strips I have been using. The white it pretty stark?


 This pic was without any dimmer, but camera refused to show it!


 This one was dimmed to 25% and camera again compensated. Might run a video and see if that works. However my wiring project continues and this section is dead at the moment. Got to have a train moving in a video ;)


Here is a comparison picture of the sunny whites at full voltage and the 6500 kelvin daylight whites at about 50%, which is about as bright as I can stand. Not bad for $17 au a 5 m legth and $22 au for a 30 amp dimmer. :D That's the dimmer resting on the hill.
Just checked for heat, and after 3 hours (at 50% dimmed) the strip is cool.

Tip of the day! 
When using these LED light strips with 3M adhesive backing strips, it is not simply a matter of wiping the surfaces and sticking them on.
You will notice most of mine are starting to release and hang.

Aluminium angle (etc) have a chemical release agent to help them in the extrusion process.
Plastic also needs a release agent to fall out of the mold.

It requires something like Isopropyl alcohol to clean them properly. and unless you paint the surface, don't even think they will stick to wood.

Cheers
Rod

2019/11/11

2019_11_11 Got my red Poppy! Thanks to the men and Wonen of Australia who defended our way of life.

2019_11_11 Lest we forget.

I have been asked several times why I am fooling around with wiring?

Well blame Tony K and his signals and for some reason, I am listening to him, now, when many other times I used to say that I have gone too far along this path to change now!

What happened?
Well I guess I discovered that my biggest frustration is fixing problems again and again and.....

My answer to one friend went like this

"I have 12 sound projects on the bench, however I am flat out (literally on the floor) altering my wiring system.
I originally ran a continuous DCC bus around the whole railroad. I did wonder how several boosters actually worked together, but I thought that is how the DCC bible was telling me to do it. I only had one 25 amp Digitrax transformer, after all.

I am now cutting this up into 5 direct districts with command station protection, and have 20 NCE EB1 circuit breakers that will further break it all up into 10 BG and 10 SG sub districts.

As I use automotive spades as my connectors, it means pulling this out and transferring the automotive female connectors from the main bus to sub district bus' already installed, but not properly utilised.

Its taking time, but it is not that bad. Paul Hawden (ex Buffer Stop) will be pleased that all the headlamp globes originally used for circuit protection are gradually being reassigned to other (landfill) duties ;)"


And so until today I have disconnected the whole DCC Bus and cut the main bus into sections.
as shown in earlier posts I very recently set up NCE EB1 boards connected to this main bus and fed protected power via the EB1's into each sub district.


I tested the branch line first, and found Honeysuckle to the branch terminal station to be connected properly, very clean and protected by an EB1.

Bullarto to Allannvale needs a separate bus feed as well as several point motors and its own EB1.

That will be a two person job, for later on.

So I moved to Wodonga Coal sidings, as you can see from last post.  This was time consuming and I have transferred almost every connection to the local BG and SG bus'
I am about half way done, but I had to take a spell from crawling around on the floor, as it was taking a lot out of me.

So I transferred my attentions to the upper level working on the tracks from the top of the Helix back to  Allanvale where two EB1 circuit breakers were installed and a heap of wire removed as surplus to needs. However we had three local bus' already installed.  I simply transferred the automotive connectors to their correct wires and finished this job in a few hours. Much easier standing or sitting up.
My future can go two ways. Get back on the floor and finish off the coal siding, or finish off the old helix and that's more attractive as I still have not recovered from last two weeks.

Today I plugged back in the 5 DCC districts, and having only transferred wires to sub districts and cutting the thru DCC bus apart, I already had a pleasant surprise.
The DCC alarms were noticeable, but only because they were silent.  Well every now and then a three beep signal announced a loco had been purged from the system.

So apparently I have already found and fixed the problem? No idea what it was but am happy its gone (5 hours later still no warnings from Command station :D )

So that is happy news and for the first time I found nothing to photograph :)
Cheers
Rod

2019/11/06

2019_11_06 Graemes Birthday Many Happies Mate!

2016_11_06  As well we continue with wiring and I start to connect the SG Helix into layout at long last!

First of all, please let me wish my good mate Graeme Hawken a very happy 74th Birthday. I hope you had a great day mate.

Track Layer

Its really great that I have a track layer on hand, Thanks Al  :D


 So as Albury yard heads towards completion of the yard track, I thought I better start planning for the Junee connection. AS explained before, this is simply a double track store road around the inside base of the helix. Trains heading for Junee are simply stored in here till they need returning towards Melbourne.


 A lot of points and a mile of wiring connections! Thanks Al, it looks great.


 AS well as setting up the main lines to enter the helix, it was time to combine all the Albury yard tracks and join the main line. These roads lead to the store roads and as well can climb the helix and exit on the top level and complete a continuous loop, should we run with only a few people to manage turning trains and shunting.


 Right hand BG roads represent Bunge and Wool Stores roads.


So Now I need a connection to the helix, so that I can set up the Indonesian crossovers which divide the runaround and the main line to the left heading for the two helix store roads. And straight ahead to a second (this time right hand) Indonesian crossover.  The straight of this crossover is the return from the helix return loop roads. The curve enters the helix and will run around 4 times climbing up towards Honeysuckle. It then enters the the other half of the room making a continuous run, should it be needed.

Linking the gap

Using off cuts from the Helix build, I built a bridge connecting Albury to it.


 Reconnecting the cut off curve, saved a heap of work.


All I need do now is cut out a filler and Bob's your Uncle :)
looks like I will need cut this a little wider to support the store roads if thats where the points end up?


Wiring Saga

 For the last few days I have been fixing some mistakes with my wiring. To do this I have cut out a lot of extra wiring that I used to separate different lines and fuse with light globes.

I decided it was a little silly to complicate the two wire DCC system that much.
So now I am removing all connections to the 40 amp DCC bus and running (or to be exact leaving only two extra wires to cover BG and SG separation only.

Ans so using NCE EB1 circuit breakers fed power from the DCC bus and then feeding protected power through the secondary bus to that district only.

Because I use spade connectors, it has been a very quick process to alter the wiring.

Already I have got results and my Digitrax system is strangely quiet Ha Ha. For a year or more persistant faults keep buzzing codes to me... but now nothing apart from some locomotives being kicked because they are not being operated at the time.


 And so I am mounting all the EB1's on table legs in plain view. Steady red LED and that circuit is operating safely, that is no shorts :)


 Tracing it all out and removing what is now redundant. Believing fully that I will not have to return here, I am tidying up all the wiring with those TK wire ties. (You will have to believe me that picture was out of focus!)


Removing yellow connectors from heavy red and black bus lines.


 Bringing the clean bus lines under neath to Wodonga Station, ready to start whole process here when I finish the other side.


 4 red lights and no warning beeps!!  It is so quiet in here ;)

And to finish off, I have a train being made ready to test Albury BG platform, and also I found these beautiful oil tanks at Wagga from SDS. Absolutely magnificent. This mob gets better and better!


Cheers
Rod Young