2017/04/30

2017_04_29 Making mountains....

2017_04_29 Graeme came to  build me a mountain!


Never much liked Elvis, but as I got older, my taste matured🚂 HaHa!

Where were we?

The undercoat is on the walls and the topcoat should blend it all in. The infinity corners, I read somewhere, help with the illusion.


Whilst Graems started the mountain, I scrounged all the foam, I could find.


Now we have some material..

 Graeme forms the foundation


Trimming it all with his "hot wire cutter"


 Who says "Mountains takes millennia! Just a few hours and it takes form.


I thought hot wires save the mess! Actually they are a gift to all modellers, and the mess is bulky and easily picked up. Much better than the dust caused by cutting it with a saw


I bought some rock moulds, so we are going to thin this out a bit to insert some castings here.


 A view from the Murray side. This aspect of the layout is more "freelance" than the rest. Of course all caused by compressing such a huge area into such a "small" room.  🔨


View from the other side.

Next episode will see Graeme adjusting the shapes, and gluing it all together. Then I will cover it with cloth and it should be ready for plaster and ground cover.

But for me its back to replacing temporary wiring. About half the layout is operating properly, and I have a feeling the contamination between territories is not far from being solved, and maybe even today :)
Cheers
Rod

2017/04/28

2017-04_27 ALDAY Track and wires!

2017-04_27
Spent our day fixing up Bullarto as well as rewiring parts of layout (still)


As per our previous post. Al took charge of Bullarto and re-laid the whole station in Micro Engineering code 70. Thank goodness we are down to out last 6 lengths of this track. We are truly blessed with Peco (true) flexible track. Our USA offerings are a very painful experience. I am sure Maureen wonders, when Al returns home each week with so many cuts and abrasions.


 As you can see it looks great now.


I completed the electrical connections, and so now we only have point motors to go in.


 Still sorting out shorts and today it was all about insulated joiners and the mistakes discovered as I rewired Wodonga Station. Putting these joiners in the wrong place allowed me to cross the droppers into the wrong territory. Mixing up wiring has caused me lots of grief. Part of the problem is my age. I can no longer twist my body as I once could. So I have to use a mirror to see underneath, making it easier to grab the wrong wire. So I moved the insulated fish plates to the points. and left the droppers where they were.


My soldering is at best woeful. And re-soldering droppers is a bit of a disaster! No matter what I do, the old solder only melts about the time the sleepers do! Its a wonder I get a connection at all (Thus my addiction to clipping the wires together.


The last fix created another fault. At Wodonga the main BG line forms three roads. Platform,No2 road and Runaround Road. I found I had to insulate all rails from the two points (adding an extra two insulators as the frogs were already insulated for live frog operations of Peco points.


This in itself created problems (of course) as I needed to remove track already fixed in place to change the insulators in.


 I had to push out the track whilst making a gap to allow me to push the rails into the insulators. This is always a bit of a task, and this time I pushed too hard and separated the rail from the sleepers. This meant I had to remove the complete length of track, remove the droppers and clean up the solder with a wick, so I could slide the sleepers off and replace them attached to the rail. Another hour lost for ever.

Next job was to turn the power back on and test a train. Well no warning signals and the correct lights were showing on the Command Stations. The track tester showed 13.6 volts, and trains were able to run....  for about 10 minutes. Then the warning beeps sounded and power was lost. I said to Al "What was the last thing you did?"  and it wasn't him, and I knew I did nothing more than put a train away in the coal siding. So Al lifted the engine off track, and nothing gained here. We moved the train back and forwards thinking a wheel was shorting. a gap. But nothing we did was helping the short to move on.  It was a strange one as well. It would reset for 30 seconds and trip the circuit breakers, then reset etc. etc.


At the same time we lost power at Bullarto, and spent some time trying to restore it so Al could test his track out, there. We never got it back, nor did I fix the new short
The only common point  was here which was worse before I started linking the heavy wire to the block connector, which screws to the back of the deck. I have 13.6 v at the block, in both connections. But it does not reach Bullarto or any other destination if I connect the feeds in all together. Sounds like I have discovered more cross connections. The short is still on the black feed. That is remove red wire short remains. remove black, short disappears! Even if I reconnect the red.

So I decided to remove all this wiring and replace it with shorter, neater cables and see if I can find the fault this way.


When I set this railway up, I made another mistake (How many can an old fart make 😕 )

I placed the UP5 controller access panels on the top level. this meant that cables were always hanging down over bottom level, an accident ready to happen. So they needed moving down to the bottom level. Might as well do that now as well.


UP5 on top level allows cables from controller to foul bottom level.


removing them is complicated by 12v power connectors as well as bus connectors and networking cables.


Anyway after cancelling a trip to Melbourne, tomorrows job was to be relocating these below. However I am not feeling well and suspect that its time to have another rest :(
Cheers
Rod

PS
forgot the bridge. A little progress. I used hot glue to secure it in place and attach the wing walls. Now I need to get the hot wire working so I can clean up the banks


the temporary block of wood was put in to help straighten up the walls
RY


2017/04/26

2017_04_25 Lest we forget those who gave their lives so we could live ours in peace!

2017_04_25     ANZAC day at  Jacobs creek (by Rod Fussell)

Anzac Day 2017 at Jacobs Creek

found this beaut little presentation, and it appears to belong to Rod Fussell.
Thank you for going to all this trouble.

Cheers
Rod

2017/04/24

2017_04_24 Gangs of workers today....

2017_04_24   Double crossing diamond crossovers and track gangs and more


 Graeme came over and worked on the new section around the Murray River


As well he put the final filler coat on the curved "infinity" corners. Just need a light sand and a paint after it dries :) Cant wait to see it painted


See where the tunnel mouth is? That will be the edge of a large hill rising to the right. The lower level double line will come out of a cutting and cross the Murray bridge. Joys of compressing the layout, I guess.

Al was ripping up track....


At first it was just a small repair job at Bullarto. But like anything  on this layout nothing ever goes so easy and it turned into  a total relay of the yard. Grey gap-filla tried this time to restore the roadbed on top of the caneite, level out a few bumps. As well Al helped touch up the branchline approach on Trentham side.  Again a lot of work that is hard to picture.

I turned out in my usual 'gofor' role. finding stuff and telling all what I wanted. As well I returned to the problem crossover and undid all the wiring around it. Even removed the crossover.
I tested the crossing and found it to be sound and fully isolated. I then checked out the wiring of the four sides of the crossover. Making sure all insulating joints were in place. Tested juicers and everything worked ok. Put it all back together and the BG still worked, however the SG shorted, still!.

I spent about three hours on it and finally started a final check of the wires, adding one dropper in at a time until I got the short back. I then changed the dropper from connecting to SG feed and then to BG feed and short remained. I moved dropper to the other side of the crossing tried BG feed and short remained. Moved it to SG side and short disappeared. Why ? DCC is just a power feed ?  Positive wire is common to the DCC bus, as is the negative wire?  But lets not dwell on any questions, just be glad it worked. Tomorrow I move to the sale yards at Wodonga where I have a double slip and two crossovers to wire in... Hope I finally get a break this time :(


You want proof? Ha Ha you got it! Al... I got it done while you were heading home. How about that :D
Cheers
Rod

2017/04/23

2017_04_22 Al Day just gone. Worked very hard.but..


2017_04_22  Al and I had a lot of work on, today. However when Al left for home, it felt like we had not gone forward at all.

Then again pictures show we accomplished heaps!


Up end Trentham New track works


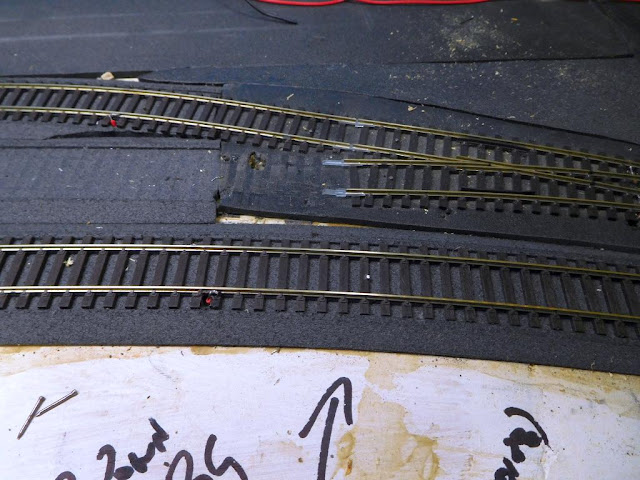
Remember the lean on the B Class in the video. Al decided, after some SDS code 88 wheel sets would keep derailing, that he would replace the track. We use Micro Engineering  code 70 flex here, and he replaced all the faulty hand laid track as well as the short piece I added over the crossing. He did an excellent job, and I see my job is still undone. Need to solder those wires on!


ME track is extremely difficult to lay. For one, only one rail slides easily, and so when you go into a curve, you need to choose which side the fixed rail should go on. Here Al found an S bend, which meant you needed to curve the fixed rail on the wrong side. The only way to curve ME track (or Shinohara and older Atlas track) is to lay it out on a flat surface and keep bending it a little at a time. test fit and adjust till you got it right. Al did a great job, and the track is easily his best effort, much better than I can do, for sure.  We will add missing sleepers next time and try out our new ballast machines.


Now the SDS tanks go through without a problem!


Al was able to remove some of my packing under the crossing, and it looks flat to me (and the camera it would seem :) )

More Diamonds that will not work.


Each end of the diamond is insulated. The two metal un-insulated connectors to the frogs ate directed via mono juicers, one for each frog.
The BG works just fine, however the SG direct shorts, may have even blown the juicer. Mods include
checking all insulated approaches. All four tracks that is 8 rails are insulated and remembering our last effort double checked. I changed out the Peco code 100 to code 75 adapter , left the links in place and insulated the connection to the code 100 SG track.
I also decided that as I have power districts ending at the crossover. That is SG district A becomes District B and same for BG.
I connected the two outside rails of the crossover to Black and Red wires in SG district A and BG district A, thinking something silly may be happening here. Like black is common, isn't it?

Finally I think I might have a bad batch of mono juicers. One works (red light changes to green)
The other stays red and shorts and turns led off till short removed.
Again I am stumped!! So I walked away to think on it, perhaps sleep on it....

More baseboard modifications?

Graeme is visiting Monday, and his roaming eye always finds the problem areas, and suggestions are forth coming, aren't they ? :D


And so we created a tray under the girder bridges to help with modelling the river. This required screwing a flat bottom under neath, which of course meant the undersides had to be cut clear to allow tray to fit in. The tray was fixed in and strengthened


I then widened the bench to 500mm to allow for a better scenery fit. here the changes to the middle island bit....


And on the Albury side. more required here when we work out where the foam board will fix.


The top level overhangs, so I guess the bottom should at least follow under it?
Continues Monday :)

Cheers
Rod


2017/04/21

2017_04_21 A video...

2017_04_21  First train from Honeysuckle

After a few weeks of replacing wiring when we have time. Al and I got several sections strung together.
Last night I was able to get an engine from Bowser towards Trentham, and reverse it back into Honey sucle.
We then ran the first revenue service out of Honeysuckle.

Light Engine movement video

First Service video

Edit
 Sorry about the first video. It somehow saved all the out-cuts on the back of the live video. Got a lot to learn, using Muvee but it is stuffed in Win10 because it uses Quicktime which is disabled by Win10. Thus I was unable to review the video in Muvee. I will reedit it :(


Cheers
Rod

2017/04/14

2017_04_13 Alday! Honeysuckle tweaks

2017_04_13  Al was here today after two weeks off with "pew-monia"

Despite being only half way through his antibiotics we accomplished a lot today
We finished off fixing down Honeysuckle and started the rewiring. We cranked up this station by applying 240v and noted that it did not operate as we thought. Better ask Tony, I guess.
However all tracks, points allow through (pushed and rolling) trains! That's a bonus.
The signals light up, off the back up battery, but not from the 12 volt supply.

The other job was to reconnect the tracks into the station and reinstall the junction. Al did most of this, and we had to overcome some issues. And this filled our whole day.
One issue was power leads and we relaid the feed from Trentham and laid in a new feed from Bowser side. I need to connect up all the droppers, now and add a supply feed to the new Bowser feed.
We should then be able to run a train direct from  Bowser into Honeysuckle. Finishing off the track upgrades in Trentham, would allow trains in from that direction.

So not much to photograph, however a lot of work required today to get this far.

Threw the 240 V switch! so far so good!


We switched it on without the frame connected. Hoping connecting the frame will fix the blacked out signals. The lights here are backup battery powered (just like the real thing)


Next job is to wash everything down, and try and reinvigorate the scenery.

I have a turntable here and tried to install it. unfortunately the directions are stored away in a safe place. When I remember where it is, I will finish the installation :(
Electrotren  Wait a minute!!  That's not the brand! Its a Brazilian Company ? I can probably get instructions from them? Brand name?? Google is not my friend either....


Tony is building a new bracket signal to allow trains to depart Honeysuckle towards the crossover.
Left arm from No 1 road towards Bowser.
Right arm from No1 road towards Trentham on the straight.
A single home will control traffic out of 2 Rd to Bowser.
Trains in 2Rd can set back and run through a crossover to run to Trentham as well.
Reinstalling this and wiring it took most of our day, but it was worth it :)
 The space above the red handled strippers will hold the relocated frame which needs to be redesigned to operate the additional roads and signals.
Hope you are feeling better soon Al.  Enjoy your company, mate and look after him Maureen :)
Cheers
Rod


2017/04/11

2017_04_10 Invented something!

2017_04_10  How do you couple an Alco Walker trailer to a Trainbuilder Walker motor?

Easy if you happen to have 2mm x 1mm round super magnets :)

I bought these from china for about $5 and was going to use them on my two Sprinters, if they ever get built in China :(

The Alco had a really nice lost wax cast scale coupling designed to use coupling bars and pins. Much too tiny to be practicable though.

On the other hand the Trainbuilder Walker has an oversized (shockingly so) representation of the same coupling with a magnet embedded in its face

First thing I am going to do, is see if Walthers still sell these link and bar couplings and replace the Trainbuilder ones. In the meantime, I used 2mm x 1mm super magnets and simply drilled out a 2mm clearance hole and super glued a magnet inside but flush with the coupling face....  pictures!


Here is the Alco produced trailer with its scale bar and pin coupling. Nice!


Here the Trainbuilder O scale coupling... Yuk!


And here is my modified Alco coupling. Looks like I will have to find those wings and finish the model off. Needs lights, glass and interior fitted.


And here is the united couplings. It works and the magnets are strong enough to hold tight through points and everywhere I ran it.. Success :D

When the Sprinters finally arrive, I intend adding these magnets to the dummy scharfenbergs, in the hope that they will hold two powered Motors together as well
 Cheers
Rod

2017/04/10

2017_04_09 Visuals? Changing the look!

2017_04_09 Kept moving on the wiring side, installing sound units, sorting out the bridges and building more walls

say it with pictures...


 Little farm off a road with a shearing shed on other side. Main road comes under the line via an old brick bridge, which appeared to be upgraded with a steel deck recently. The H Beam is large enough to sit neatly over the 12 mm ply. Nice fit between brick piers as well.


 I dulled down the plastic structure by spraying it with water and rubbing plaster all over it. I then waited for it to dry and then rubbed the plaster off with a dry cloth


When I fit the wing walls and bulk it up with foam, I will finish the brickwork off by final clean with a damp cloth. Then glue on the stone caps and it should look ok.

Walls? Graeme came for a visit Saturday. Had an enjoyable session chatting about all sorts of things, but Graeme got his corners in...


I forgot to take a picture of it finished. All the edges were plastered up, readying the job for sanding and painting.

We had a bridge to help cover the double line opening above. Unfortunately we dropped it. But it should look great blended into the back scene


Bridge  ??  try tunnel mouth  ;)


Its a concrete structure, and what makes it stand out is the marks formed by the boxing framework constructed to hold the concrete pour in place, which are quite visible on the tunnel face,
Cheers
Rod