2019/10/31

2019_10_31 Another parcel and more of Al's trackwork.

2019_10_31 The rest of the LED order arrived. And its "Al-day" .. allday  :D

The rest of the LED order arrived. Thats another 25 m of white LED strip to add to the 50 m of sunny white still in  stock. As well 4 12v 30a dimmer switches. Still have no idea what the 30a Amplifier dimmers are for? Anyway thats for another day.

Al went back to Albury to lay track. However I detected a huge shudder when I showed him how it was to go.

Whilst Al was working at Albury, I went looking for a persistant short, that I keep thinking I have sorted, and alas keeps coming back. First I had to move masonite and perspex from under the layout to gain access and then sweep up another huge amount of sawdust and foam discovered lurking underneath :(
I then started removing connections until the short went away. Recently I purchased another 10 NCE circuit breakers. I am now sorting out the wires so that each section is protected by one of the 20 circuit breakers I have to use. I will set up 5mm RED LED's which will light up when a short occurs, to stop this time consuming search, which takes up so much of my time. I might have feeds coming from two different directions, causing the shorts, maybe?? Reverse loops that only cause a short when a particular point is thrown?  Who knows, but its long since time I sorted this out.

So what did Al face today?  Possibly the most difficult bit of trackwork he has faced. Lets show you how he fared.

Picture Album


 Back adjacent to station, the two tracks closest the blue wallare BG tracks heading for Bunge. To do this they must cross the SG track via three diamond crossovers.
The first crosses the 'runaround track' which becomes the 'coal road'
The second diamond crosses the 'through track' which becomes the 'main line'
The third diamond crosses the 'platform track' which becomes the 'loop road'


 After the diamond, the runaround enters a point for access to the top yard and loco.


 Looking forward to all the wheels clicking through the diamond crossovers :)


 The platform track passes through the diamond befor running through a high speed point (80KPH)
switching trains from loop track to the Junee main line.


 The track in the distance is just sitting there. It will look perfect after Al cuts it all in.


 Just roughed it out so Al can see where he is going. from bottom to top. The BG is fixed including the first point.
The SG crossover is fixed in but the points at top right is just sitting there.


 The "Bunge" BG access track forms a loop to allow the pilot to drop off , run around or pick up wagons to return to Victoria


And Al had to leave for home as I pondered where the double slip needed to go. Soon after he left I worked it out. Now I have to work out how to wire it up. Here it is Al, See you Tuesday.

2019/10/30

2019_10_30 A clean up, confusing LED parcel delivery and a beaut point controller!

2019_10_30 A new parcel from Talking Electronics and another containing LED's from China.

First of all, I continued with the wiring and got all the UP5's upgraded with a bus connection and 12v direct connection,

Here is a pic of the new clips and ties holding wiring together clear of the future helix'


Then I started to look for stuff, which ended up spending most of the day cleaning :(


 ouch!!


 These keep moving around from place to place. In fact I am slowly working on them, and cant finish some jobs, because I am waiting for parts, or just plain unable to get past a particular job. Nothing is really easy. A sound install can take me a few hours or all day, depending on the model.
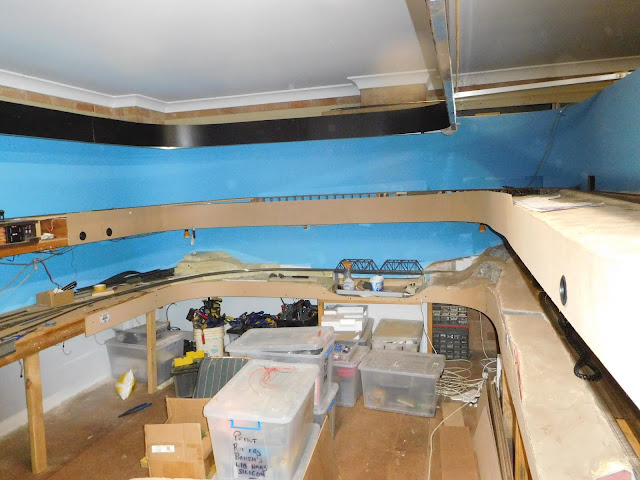

Wodonga Station is unusable as it becomes a storage bench. When I need to access it, it all moves. However with Al working on Albury, I dare not put all this stuff back there!


 As you come in the door, this place has become a "put it here"


 So first thing was to clean the floor again. This was recently done only two weeks ago. However a lot of work has been done.


 Ok first bit vacuumed and clean.


 The Loco area almost clean.


 Coal siding about 75% done


 Albury 95% done. Plenty of room for Al tomorrow.


The pile has grown a little.


More on the layout lighting.
I recently ordered 100 m of 600 led (per 5m) 


 But today this parcel turned up. It is a 30Amp Dimmer amplifier, and the directions tell me nothing!


 If anybody has used them, and can explain the connections, I would appreciate it (freight_man@hotmail.com)
These Chinese are pretty good and this goes straight over the top ;)


 I guess my 12v is for connection to power (the led strips come with a dimmer and plug pack suitable for 5m of lighting) The output goes to the 5 strips (5 x 5m) That's probably about 30 amps worth ??
But the power packs are 5 x 7.5 amps?? 


Talking Electronics 
point controller system, includes point motor


Talking Electronics from Dingley finally sent me my order. There was a mixup, but they cheerfully fixed the problem, after I returned the incorrect product. Thank you kind Sir! Will certainly deal with you again.


 Here is what you get (you supply battery to test)
A nice long run of wire a DPDT push button
a controller circuit to operate the tiny point motor.
The tiny point motor

OK I tested it out on this board. The actuating wire moves up and down in this picture


 A bit disappointing as I  planned to set it up parallel to track, just like the real ones are mounted.


So I bent the brass wire at the end ( the wrong way as it turned out) and tested it as shown by bending it again, close to the motor


positioned so, it made a solid contact with each rail and works a treat.

I have several places where I cannot mount a motor underneath. So these can go on top. I can turn the motor upside down and shorten the throw arm on the point, making the motor look about right for a real one. I will buy the biggest dummy point machine I can find, and glue it on top to make it look more realistic. Pretty pleased with this :)


Cheers
Rod

2019/10/28

2019_10_28 Chasing my demon

2019_10_28 Spending a day chasing circuits.

Yesterday started off with a 12 volt DC point power grid failure.
It took some time to trace the fault to a broken wire on a point motor, 2 pole Double throw switch. We were moving the switches into the new valence, and some wires needed lengthening. In one case I managed to short out the plus and minus wires connecting to the switch.
Whilst doing this I noticed that my DCC loconet was not as efficient as it once was.
The DCC voltage at the command station is about 13.7 v.
But my loconet is over 51 feet long in one direction and about 90 feet in the other. As well the layout is double stacked. And so I found several ways to reduce the total length.
Several of the latest UP5 installs on the new helix were not actually able to power a throttle. But now I have fixed the problem, and all work. In fact the system is working much better than it has for some time.

As well as fixing the 12v DC bus and the DCC loconet, I was able to  tidy up the wiring, in particular the 12v bus and the reorganized cat cable.
Recently I purchased a securing system after seeing how Tony K. was securing his wiring. It works extremely well.


Small clips are fixed to ribs using  small screws (You can get them with 3m self adhesive tabs)
I dont have much luck sticking stuff to wood, and so I chose screws.


First using the small screw, fix the device where required.


push a zip tie through the slots provided.


Pull the tie closed and tighten it to the wires.
Then work your way around until you have everything secured and tidy...
I have 6 months of tidying to do :(

Cheers
Rod

2019/10/27

2019_10_27 Cut, Glue and Paint! The pretty bits Ha Ha!

2019_10_27 Another productive few days improving the look?


 Graeme surveys our handiwork. Basically gluing (no more nails) fascia over old damaged area to improve looks and assist with application of scenery.


 Waiting for glue to dry


 Might as well drill out the holes for our point controllers.


 Test fit them.


 Graeme used a Stanley knife to trim off the tops and match the contours.


OK next day, and time to remove the clamps and paint it all.


Again using a water based undercoat to bring out the rich green color of the top coat.


 Wait a day and apply the top coat.


 Still need to do some more trimming on top edge. Tried it but my Arthritis made it too difficult. Graeme will come back and do it.


Played around with the trestle. Painting the backdrop below deck level green, and if I paint the top blue, you wont be able to see the tracks behind it.

Graeme's point button holders 


Desk top cable tidy.  Simply push out the middle bit and discard.


Start up you 3D printer after drawing up a suitable insert, and print enough to fill all the holes in the fascia :D  Easy for Graeme eh? He has one of those new fangled things ;)

note: old farts definition  of fangle. obsolete : a silly or fantastic contrivance : gewgaw, gaud.


 Our two bits need to be brought together.


If you have your drawing right, press fit them.


And now your switches can be mounted into fascia with out you having to worry about catching them with your clothing as you walk past. And besides they look fantastic as well.


Here is a Tam Valley version with three holes allowing a push button and two LED indicators to be fitted.


 Of course the original version accepts a 4 pole double throw toggle from JayCar.


 We are pretty happy with how it all looks now. Soon it will be time to spruce up the scenery.


 Also it will be time to play around with permanent control panels. This is how Albury Station is looking to be. Stay tuned to find out how we go about this.

Cheers
Rod